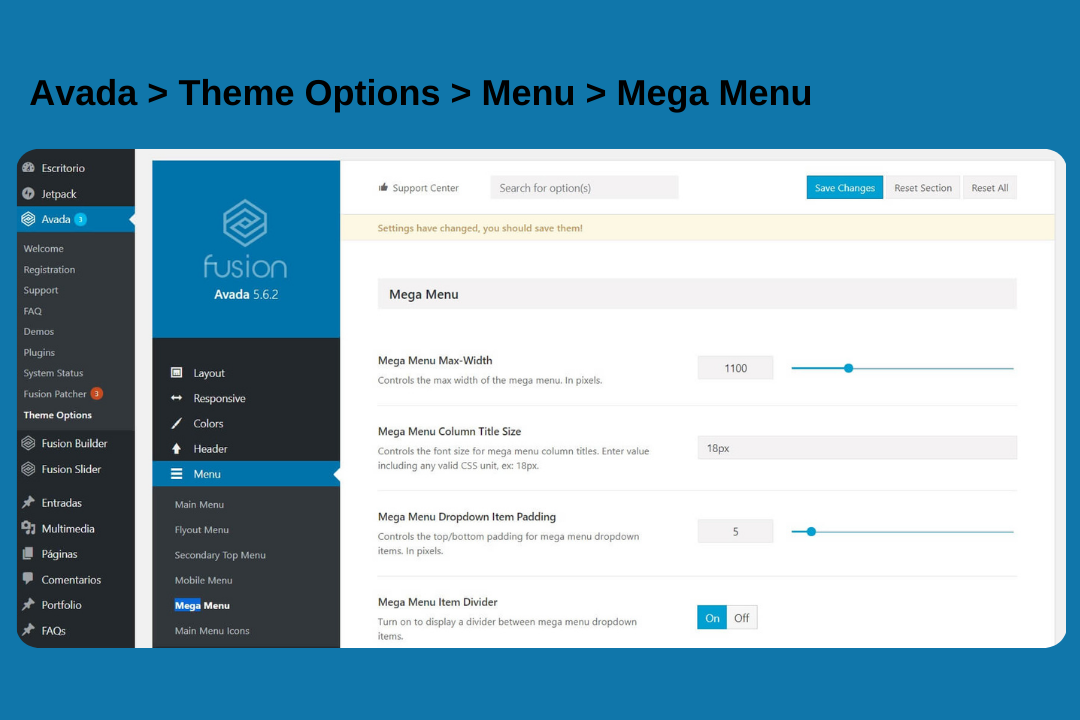
Overview of Avada Mega Menu Location
The Avada Mega Menu is a customizable menu system that allows for the display of multiple columns, images, widgets, and other elements within a single dropdown. Unlike traditional menus that display only a list of links, the Avada Mega Menu Location can showcase various content types, making it ideal for complex sites with extensive navigation needs.
Key Features of Avada Mega Menu
- Multi-Column Layouts: Supports various column arrangements to organize links and content.
- Custom Widgets: Allows the inclusion of widgets like recent posts, search bars, and more.
- Image Integration: Lets you add images and icons for a richer visual experience.
- Custom Styling: Provides options for detailed styling to match your site’s design.
How To Assign A Mega Menu
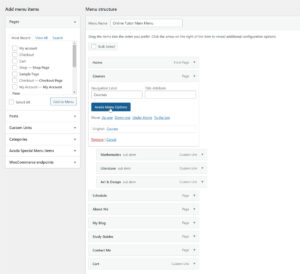
Once you have completed your Mega Menu, you assign it to a menu item, via the Avada Menu Options. Below we can see the menu for the Avada Online Tutor prebuilt site. Here, the parent item we want to add the Mega Menu to is the Courses item. The existing sub-items in this example can be left as is, and will display according to the Mobile Breakpoint set in the menu Element. Alternatively, you could create separate menus for Medium and Small Screens.
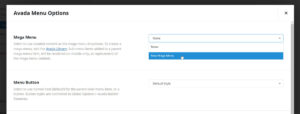
The top item in the Avada Menu Options is Mega Menu, and here we select our completed Mega Menu from the dropdown list.
That’s it. Now our Mega Menu will display on the front end when mousing over the Courses menu item.
Location of the Avada Mega Menu
The Avada Mega Menu Location within the Avada theme depends on several factors, including your site’s layout and the configuration settings. Below are the main locations and considerations for placing and configuring your Mega Menu:
1. Header Menu Location
Description: The most common and primary location for the Mega Menu is in the header of your site. This placement ensures that the menu is easily accessible to users from any page on the site.
How to Configure:
- Navigate to Avada > Menus:
- Go to the WordPress Dashboard.
- Select “Avada” and then “Menus” to access the menu settings.
- Create a New Menu:
- Click on “Add New” to create a new menu or select an existing one to edit.
- Name your menu and save it.
- Assign the Menu to the Header:
- Go to “Manage Locations” within the menu settings.
- Assign your menu to the “Primary Menu” or “Header Menu” location.
- Enable Mega Menu:
- For each menu item where you want to enable the Mega Menu, go to the “CSS Classes” field and add “mega-menu” to enable the Mega Menu feature.
2. Footer Menu Location
Description: The Mega Menu can also be placed in the footer, which is useful for displaying additional navigation options or secondary menus that complement the primary header menu.
How to Configure:
- Navigate to Avada > Menus:
- Follow the same steps as for configuring the header menu.
- Create or Select a Footer Menu:
- Either create a new menu or edit an existing one designated for the footer.
- Assign the Menu to the Footer:
- Go to “Manage Locations” and assign your menu to the “Footer Menu” location.
- Enable Mega Menu:
- Ensure that the Mega Menu is activated for relevant items in this footer menu.
3. Sidebar Menu Location
Description: Incorporating a Mega Menu in the sidebar can be effective for displaying a hierarchical structure or additional options without overwhelming the main navigation area.
How to Configure:
- Use a Widget:
- Navigate to “Appearance” > “Widgets” in the WordPress Dashboard.
- Add a “Custom Menu” widget to your sidebar widget area.
- Select Your Mega Menu:
- Choose the Menu you created from the dropdown menu options.
- Configure Display Options:
- Adjust the widget settings to control how the menu appears in the sidebar.
4. Custom Location
Description: For advanced users and developers, Avada allows for custom placements of the Mega Menu using hooks and shortcodes, which can be ideal for creating unique navigation experiences.
How to Configure:
- Use Avada Hooks:
- Avada provides hooks that allow you to insert the Mega Menu into various parts of your site’s template.
- Refer to the Avada documentation for a list of available hooks and how to use them.
- Implement Shortcodes:
- If you need to place the Mega Menu in a specific page or post, you can use shortcodes provided by Avada.
- Insert the shortcode into the desired location within your content editor.
Best Practices for Mega Menu Placement
1. Keep User Experience in Mind
- Accessibility:
- Ensure that the Menu is easily accessible and navigable. Avoid cluttering it with too many items.
- Use clear and descriptive labels for menu items.
- Responsiveness:
- Verify that the Menu works well on various devices and screen sizes. Test its functionality on mobile devices to ensure a smooth user experience.
2. Maintain Visual Consistency
- Design Harmony:
- Ensure that the Menu’s design aligns with the overall aesthetics of your site. Use consistent colors, fonts, and styles.
- Highlight Important Links:
- Use visual cues like bold text or icons to draw attention to important links or categories within the Mega Menu.
3. Optimize for Performance
- Minimize Load Times:
- Avoid overloading the Mega Menu with too many images or widgets that could slow down page loading times.
- Optimize images and use caching plugins to enhance performance.
- Test Across Browsers:
- Test the Mega Menu across different web browsers to ensure compatibility and consistent behavior.
4. Regular Updates and Maintenance
- Review Menu Items:
- Regularly review and update the menu items to ensure they are relevant and up-to-date.
- Remove outdated links and categories.
- Monitor User Interaction:
- Use analytics tools to monitor how users interact with the Menu and make adjustments based on user behavior and feedback.
Troubleshooting Common Issues
1. Mega Menu Not Displaying
- Check Menu Configuration:
- Ensure that the Menu is properly configured and assigned to the correct location.
- Verify Theme Compatibility:
- Ensure that your version of Avada is up-to-date and compatible with the Mega Menu feature.
2. Styling Issues
- Custom CSS:
- Use custom CSS to override any styling conflicts and ensure the Menu matches your site’s design.
- Inspect Element Tool:
- Use your browser’s inspect tool to troubleshoot and adjust CSS styles affecting the Menu.
3. Responsiveness Problems
- Media Queries:
- Check and adjust media queries in your CSS to ensure that the Mega Menu displays correctly on mobile devices.
- Test Across Devices:
- Perform thorough testing on various devices and screen sizes to identify and address any responsive design issues.
Buy mega menu builder at cheap price from https://www.wpthemenplugin.com/product/royal-addons-for-elementor-lifetime/
The Avada theme for WordPress is renowned for its flexibility and customization options, and one of its standout features is the Menu. This powerful tool allows users to create expansive and visually engaging menus, enhancing user experience and site navigation. Understanding how to effectively position and utilize the Menu is crucial for optimizing your website’s functionality and aesthetics.
In this article, we will explore the various aspects of the Avada Menu, focusing on its location, configuration options, and best practices. By the end, you will have a thorough understanding of how to leverage this feature to improve your site’s navigation.
Conclusion
The Avada Mega Menu is a versatile and powerful tool that can significantly enhance your website’s navigation and user experience. By understanding its various placement options and following best practices for configuration, design, and maintenance, you can create a visually appealing and functional Menu that meets the needs of your users.
Whether you choose to position the Menu in the header, footer, sidebar, or a custom location, ensure that it aligns with your site’s goals and user expectations. Regularly update and optimize the menu to keep it relevant and efficient. With the right approach, the Menu can become a valuable asset in your site’s navigation strategy.


